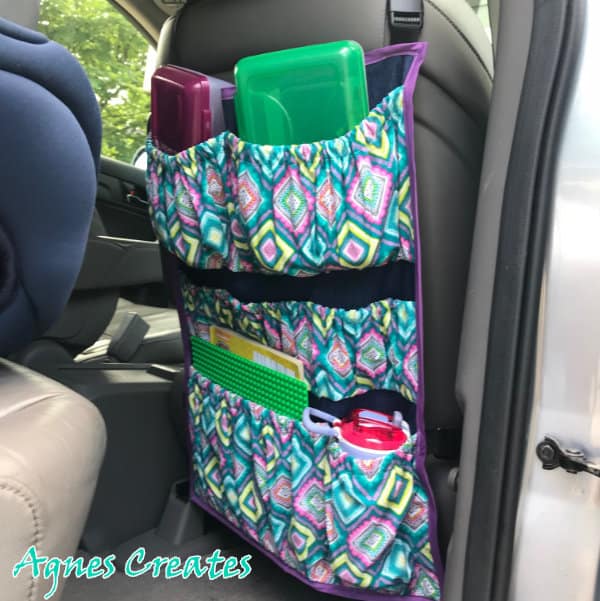
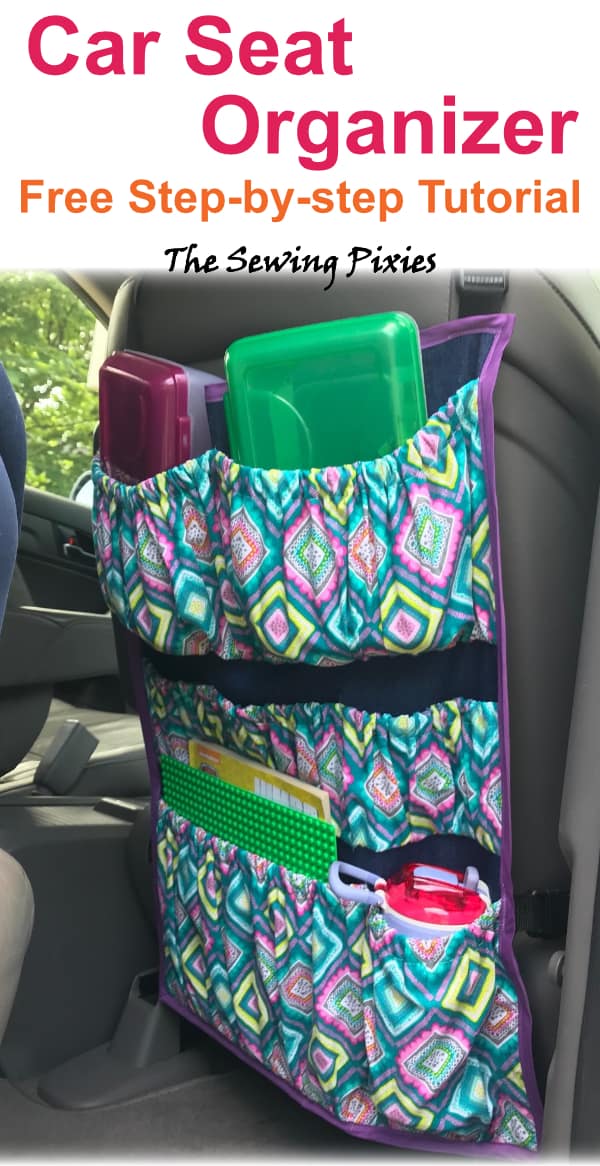
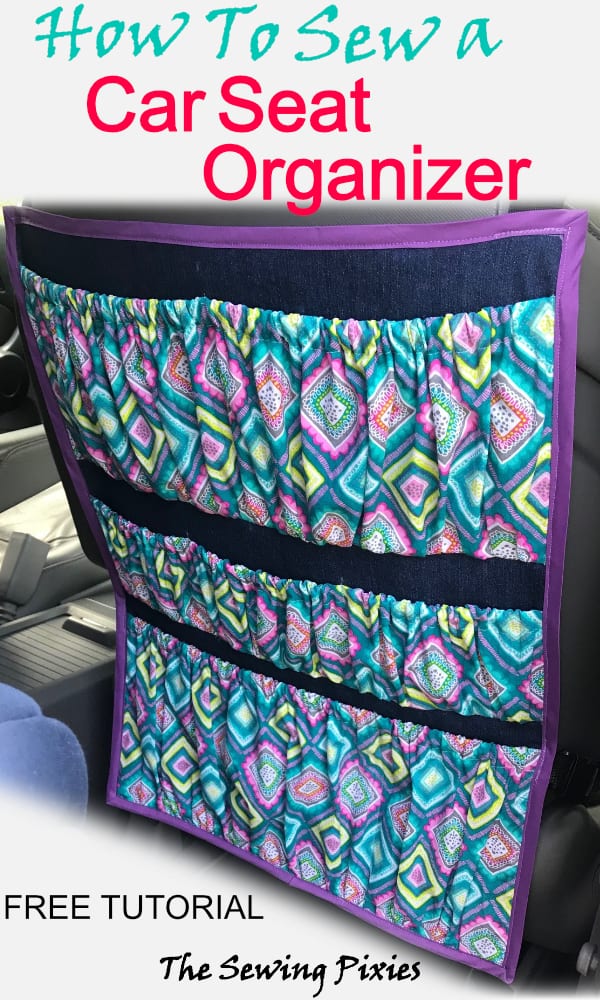
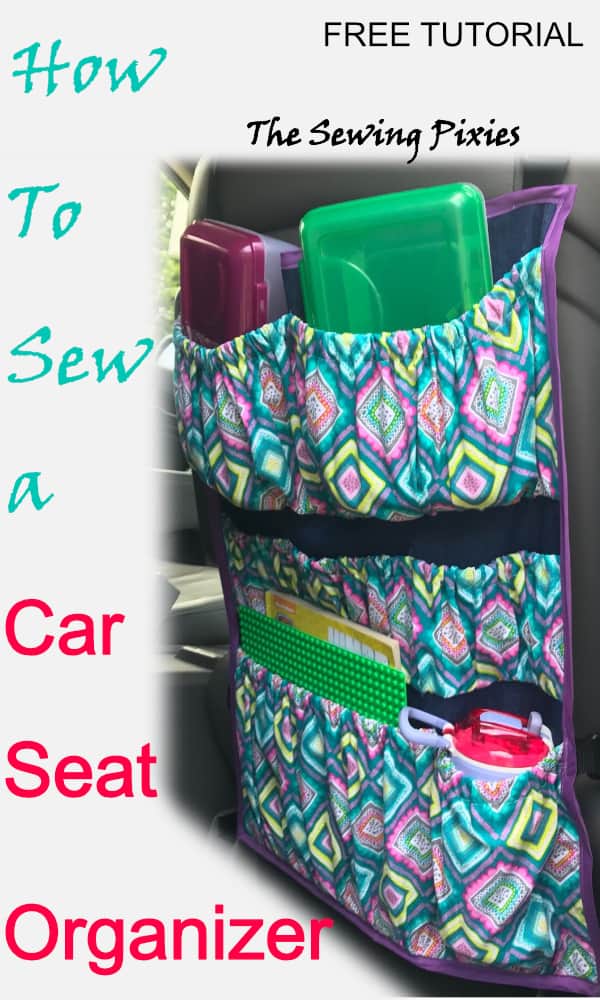
Learn how to sew a car seat organizer following my detailed step-by-step tutorial! A car seat organizer is a must, especially if you chauffeur your kids around!
Having kids brings a lot of changes in our lives, and I think most of you will agree with me on that. Sometimes we don’t know what day of the week it is, we don’t recognize ourselves in the mirror, our house doesn’t look this same and neither do our cars, LOL! I came up with an idea on how to sew a car seat organizer, that may at least help you with recognizing your car again 😊. This post contains affiliate links for your convenience (which means if you make a purchase after clicking a link I will earn a small commission but it won’t cost you a penny more)!
Always wash and dry fabric ahead of time to pre-shrink it.
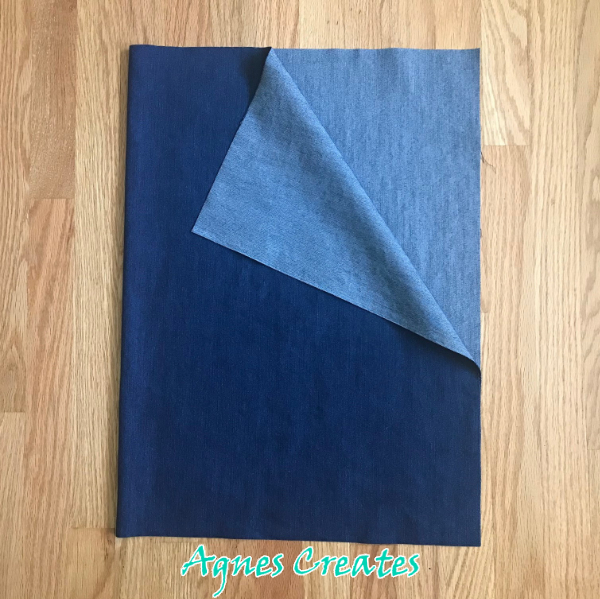
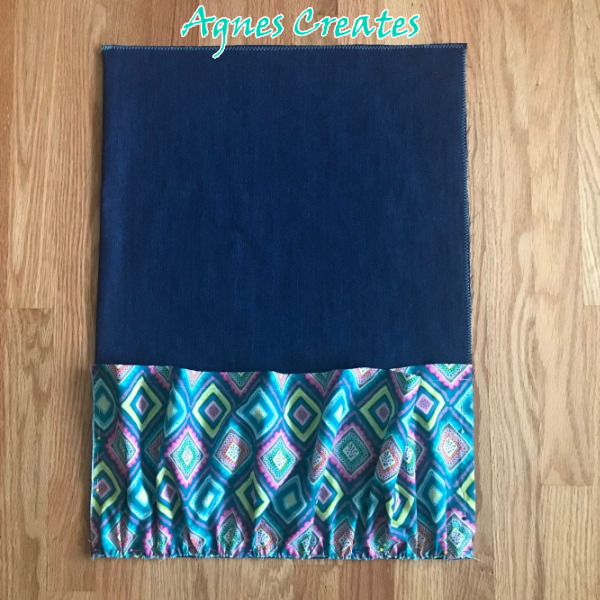
Step 1. Fold the denim fabric in half. Cut a 17”x 24” rectangle, the longer edge on the fold.
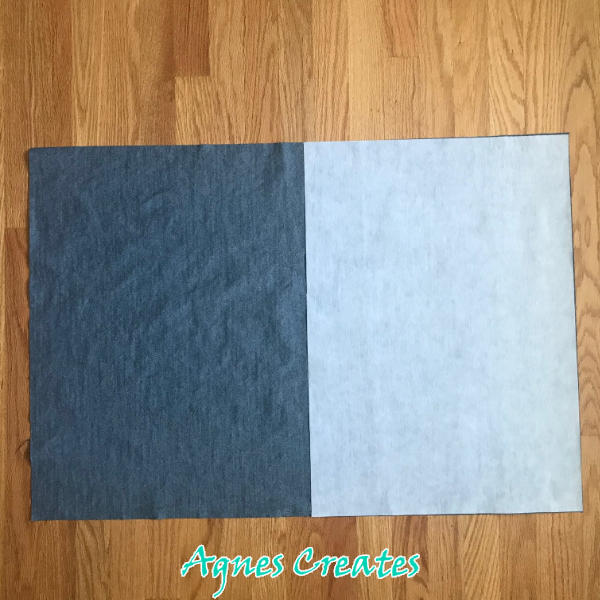
Step 2. Open the cut-out denim piece and iron on the stabilizer to just one half, the wrong side of the fabric.
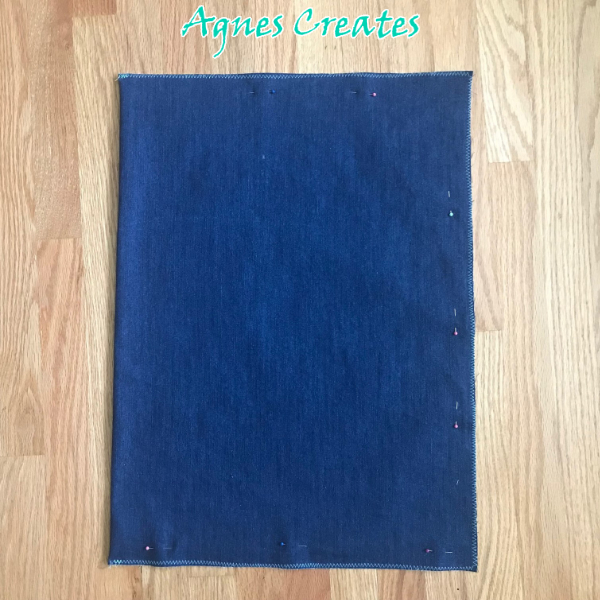
Step 3. Fold it in half and align the edges. Pin and stitch together the raw edges using a zigzag stitch. That will be the base of the organizer.
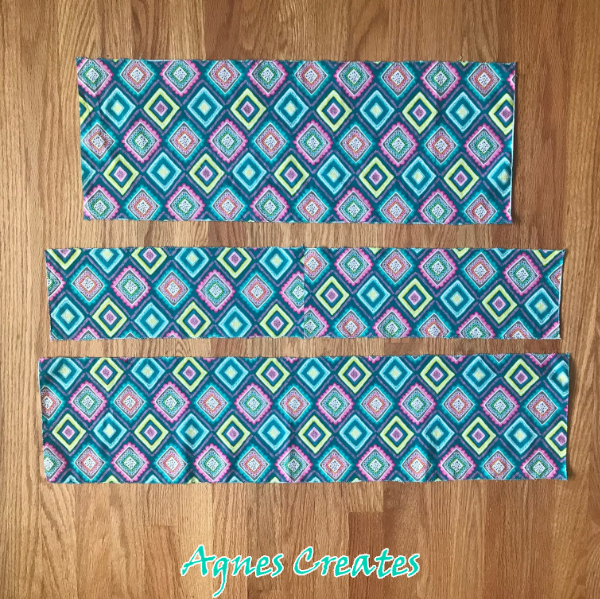
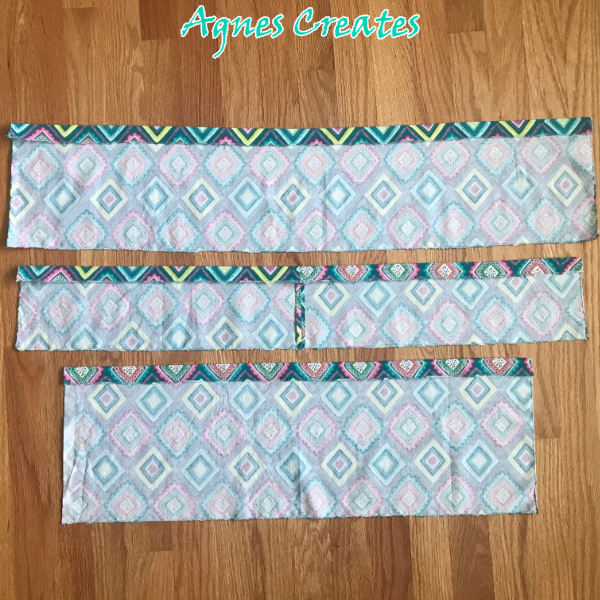
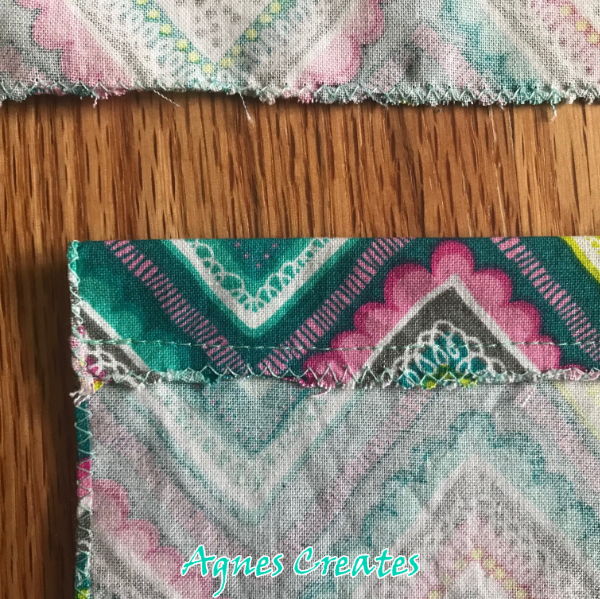
Step 4. Cut three rectangles out of the quilting fabric and overlock them with a zigzag stitch. It prevents fraying.
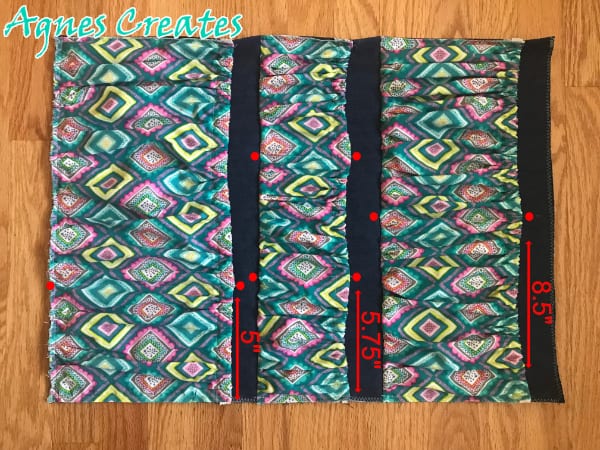
Measurements:
8.5”x 34”
6”x 32” (as you see in the picture I sewed 2 smaller pieces together because I had less than 2/3 of a yard of fabric)
10”x 27”
You will use these pieces to make the pockets.
Step 5. Fold 1” wrong side together, one of the longer edges of each piece. Iron and pin.
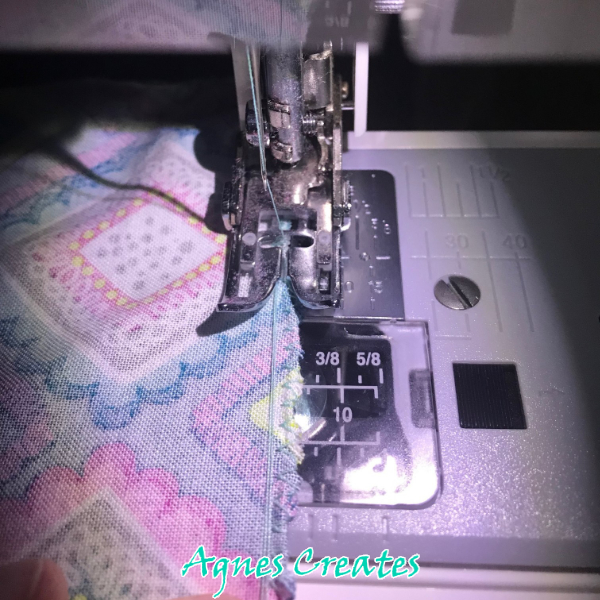
Stitch 0.25” from the raw edge of the fold.
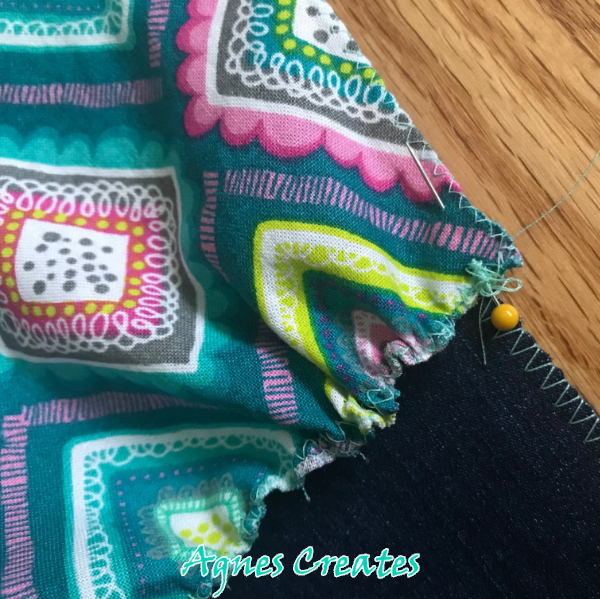
Step 6. Gather the opposite raw edges on all 3 pocket pieces, so the gathered side will be 17” long.
TIP: How I gather is: pull the thread from the bobbin and the spool (a little longer than the length of the edges you want to gather). Then zig-zag along the edge, making sure both threads are in the middle of the zig-zag. Now, gather pulling the threads. It is very important to gather as evenly as possible. After you gather to the length you want, secure the threads rolling them over a pin and pin to the side of the fabric.
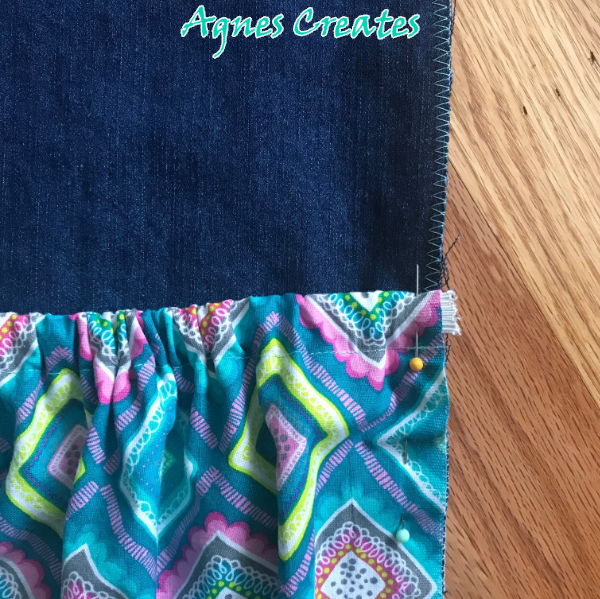
Step 7. Pin the gathered edge of the biggest pocket piece, right side up, to the bottom of the denim base. Pin the sides too, but do not stitch the sides yet. Stitch just the bottom edge to the base.
Step 8. Cut the elastic into 17.5” pieces. Attach a safety pin to one end of the elastic and push it through the casing you made before. Make sure the other end of elastic won’t disappear inside the casing. Leave 0.25” of elastic out and pin, aligning the short raw edges of the pocket to the sides of the base. Stitch the sides, stitching through the elastic to keep it in place.
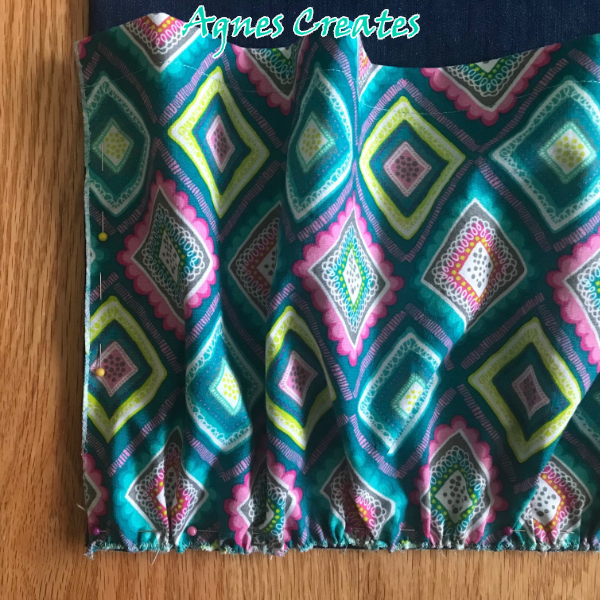
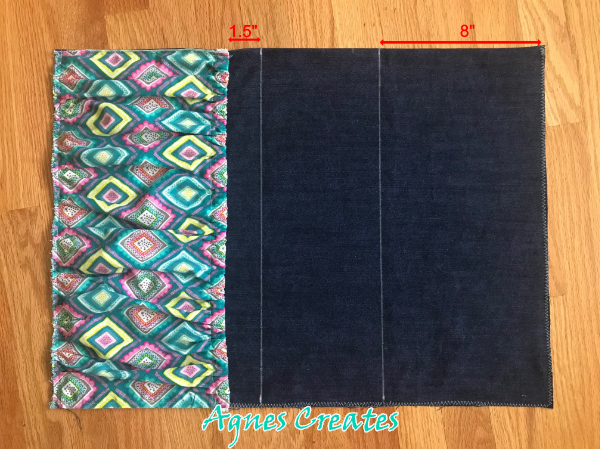
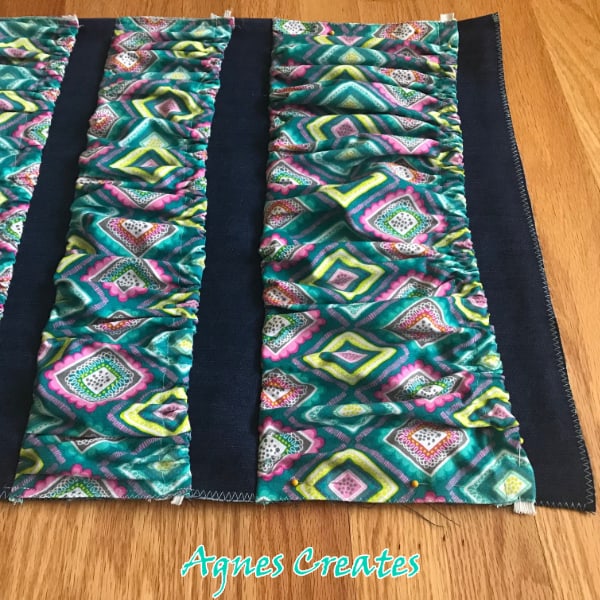
Step 9. Draw 2 lines 8” from the top of the base, and 1.5” from the top of the bottom pocket.
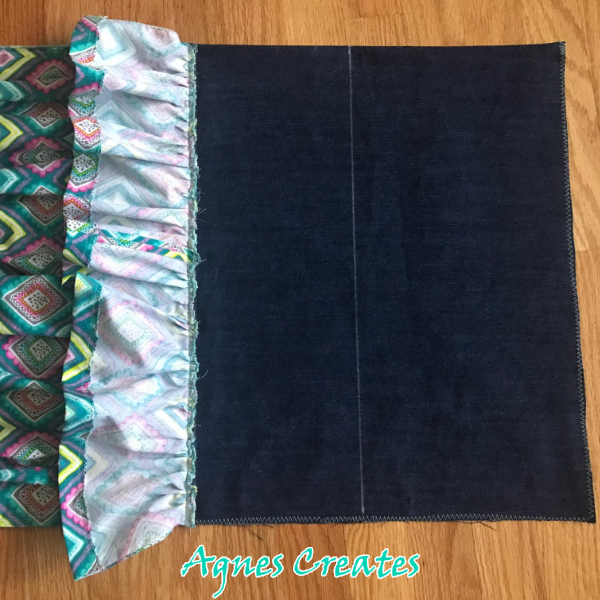
Step 10. Pin and stitch the gathered edge of the middle pocket piece above the big pocket right side down. The body of the pocket piece goes toward the bottom of the base, pin, and stitch along the drawn line.
Step 11. Repeat step 8.
Step 12. Stitch the next pocket piece the same as the middle one and repeat step 8.
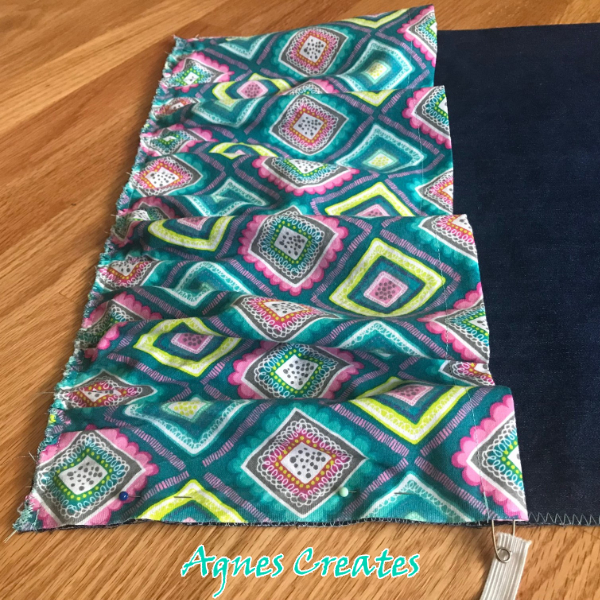
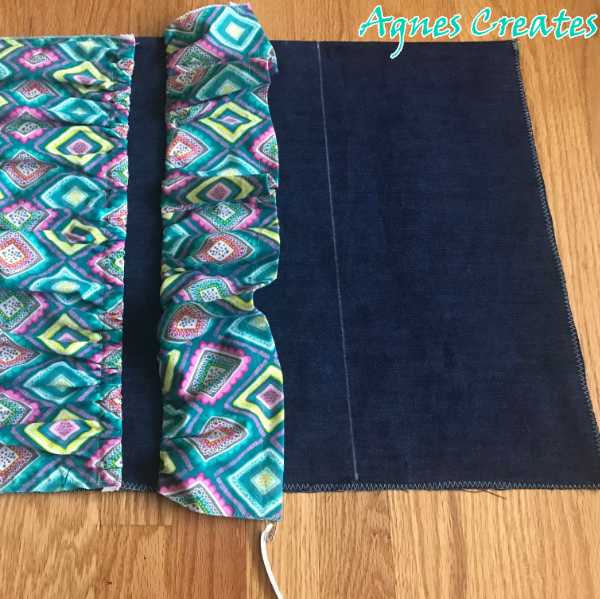
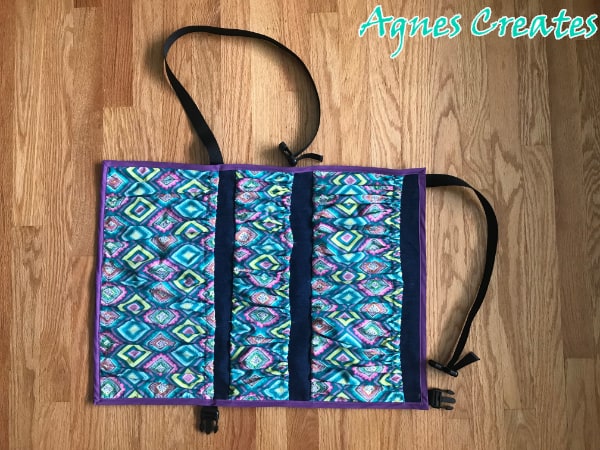
Step 13. Divide the long pockets into smaller ones to the size you want (you are welcome to follow my measurements as marked in the picture). Using the soluble pencil, mark the width above and below the pockets. Spread the fabric on the elastic evenly and stitch from one mark to the other.
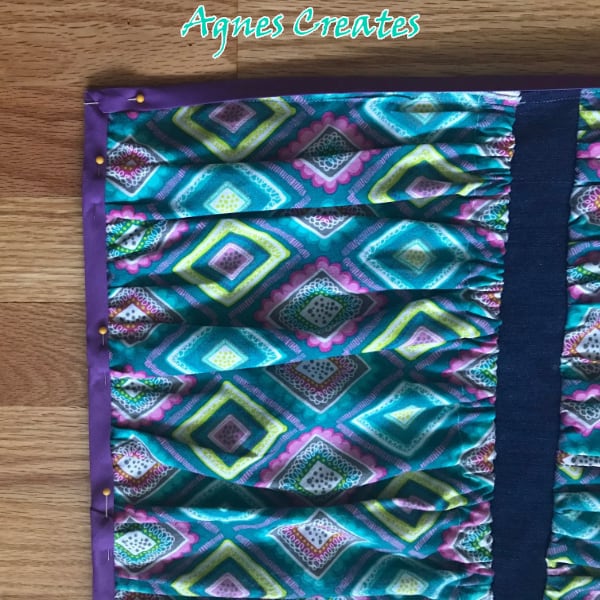
Step 14. Using bias tape, finish all edges of the denim base.
TIP: If you are straggling or just learning how to sew with bias tape follow the step-by-step instructions at Merriment Design.
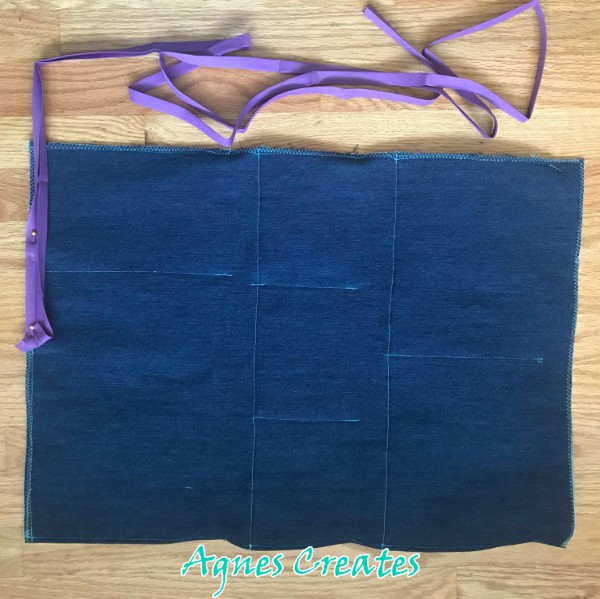
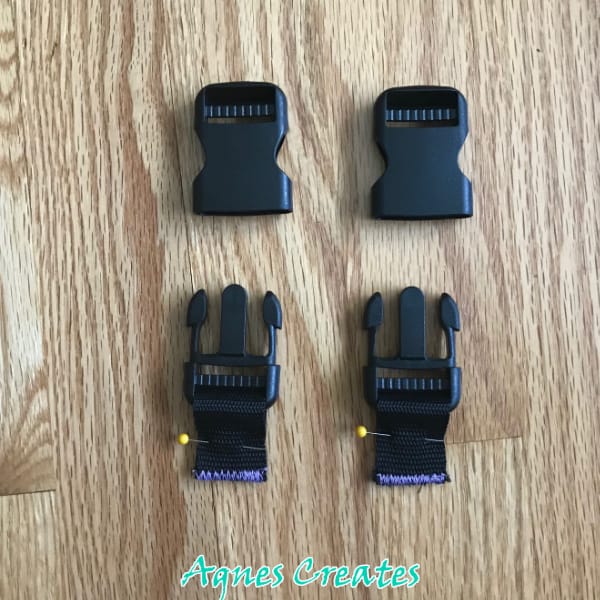
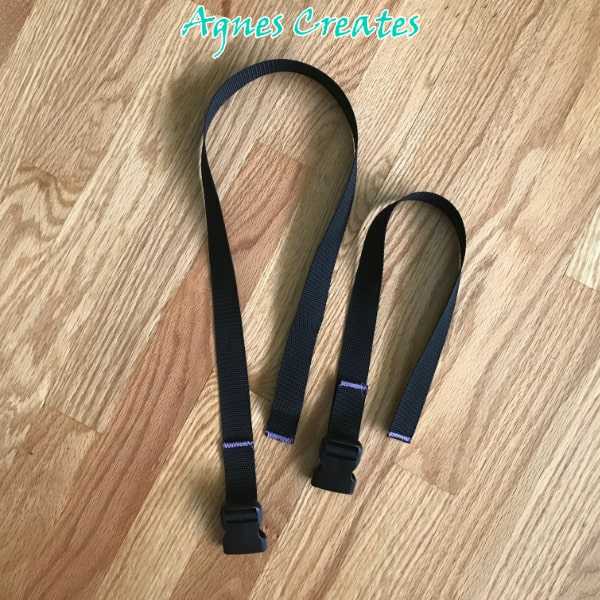
Step 15. Cut 2- 3” pieces of strapping. Pull each through the same buckle pieces. Align the raw edges and overlock with a zigzag stitch.
Step 16. Cut 34” of strapping and you will end up with a 20” piece. Overlock the raw edges of the straps. Pull each through the other buckle pieces.
Step 17. Pin the straps with buckle pieces to the back of the denim base as shown in the picture and stitch.
You just finished sewing a car seat organizer!
I hope you enjoyed sewing the car seat organizer to have your car look clean and tidy. Also, you can share a picture of your car seat project on my Facebook page.
Came out great- the author must have small car seats, had to add 12” onto nylon strap for bottom part/ WAY to tight , And FYI- sew down tip of strap or they slide out !
Hi Hannah,
not much if you buy on sale. Hobby Lobby and Joann Fabrics always have good deals and coupons. Have fun making the organizer. Let me know if you have any more questions.
What a fabulous idea! Thank you so much for posting such a detailed tutorial. It is so awesome I have included your link in my 10 Awesome Travel Accessories to Sew post. You can check it out here! https://whatsnanamaking.com/travel-accessories-to-sew/

Came out great- the author must have small car seats, had to add 12” onto nylon strap for bottom part/ WAY to tight , And FYI- sew down tip of strap or they slide out !
How much do materials cost to make ?
Hi Hannah,
not much if you buy on sale. Hobby Lobby and Joann Fabrics always have good deals and coupons. Have fun making the organizer. Let me know if you have any more questions.
What a fabulous idea! Thank you so much for posting such a detailed tutorial. It is so awesome I have included your link in my 10 Awesome Travel Accessories to Sew post. You can check it out here! https://whatsnanamaking.com/travel-accessories-to-sew/
Thank you Nana!
Im going to make one of these for my daughters suv…she seriously needs one lol.
Hi Carla! I made that one for my daughter. She and I love it. It holds all of her road trips activities. Enjoy!
Thankyou very much for your awesome tutorial,i’d like to try your tutorial🤗🤗
I am glad you like it! Its super easy to sew.